To connect a VR headset to your PC, follow these steps. First, ensure your PC meets the VR headset’s requirements.
Next, install the necessary software and drivers. Virtual Reality (VR) is an exciting way to experience games and other content. Connecting a VR headset to your PC can seem daunting, but it’s easier than you think. With the right setup, you’ll be immersed in no time.
This guide will walk you through the process step by step. You’ll learn what you need, how to install software, and troubleshoot common issues. Whether you’re new to VR or upgrading your system, these tips will help you get started. Get ready to dive into a new world of VR on your PC.
Credit: www.vive.com
Choosing The Right Vr Headset
Connecting a VR headset to your PC opens a world of immersive experiences. But first, you must choose the right VR headset. This decision can impact your overall experience. Let’s explore the most popular VR headsets and their compatibility with PCs.
Popular Vr Headsets
Several VR headsets are available today. Here are some of the most popular ones:
- Oculus Rift S: Known for its high-quality graphics and ease of use.
- HTC Vive Pro: Offers a premium experience with excellent tracking.
- Valve Index: Provides a high refresh rate and great build quality.
- PlayStation VR: Designed for PlayStation but can be connected to PC.
- HP Reverb G2: Known for its sharp visuals and comfort.
Compatibility With Pc
Not all VR headsets work with every PC. Check the compatibility before you buy:
| VR Headset | Minimum PC Requirements | Special Notes |
|---|---|---|
| Oculus Rift S | Intel i3-6100/AMD Ryzen 3 1200, 8GB RAM, NVIDIA GTX 1050 Ti/AMD Radeon RX 470 | Requires a USB 3.0 port |
| HTC Vive Pro | Intel i5-4590/AMD FX 8350, 4GB RAM, NVIDIA GTX 1060/AMD Radeon RX 480 | Needs multiple USB and HDMI ports |
| Valve Index | Intel i5-4590/AMD FX 8350, 8GB RAM, NVIDIA GTX 1070/AMD RX Vega 56 | Requires DisplayPort 1.2 and USB 3.0 |
| PlayStation VR | Intel i5-4590/AMD FX 8350, 8GB RAM, NVIDIA GTX 970/AMD Radeon R9 290 | Needs third-party software to connect |
| HP Reverb G2 | Intel i5-4590/AMD Ryzen 5 2600, 8GB RAM, NVIDIA GTX 1080/AMD RX 5700 | Requires DisplayPort 1.3 and USB 3.0 |
Ensure your PC meets the minimum requirements. This ensures smooth performance and a better VR experience.
Checking Pc Requirements
Connecting your VR headset to your PC is thrilling. But first, ensure your PC can handle it. Proper hardware and software requirements are crucial. This section will help you understand the needed specifications.
Minimum Specifications
Your PC must meet certain minimum specifications to support a VR headset. Here are the basics:
- Processor: Intel i5-4590 or AMD Ryzen 5 1500X
- Graphics Card: NVIDIA GTX 970 or AMD R9 290
- RAM: 8 GB or more
- Video Output: HDMI 1.4, DisplayPort 1.2, or newer
- USB Ports: 1x USB 3.0 port, plus 2x USB 2.0 ports
- Operating System: Windows 10
Recommended Specifications
For the best VR experience, aim for higher specifications. These recommendations ensure smooth performance and better visuals:
- Processor: Intel i7-8700 or AMD Ryzen 7 2700X
- Graphics Card: NVIDIA GTX 1080 or AMD RX Vega 64
- RAM: 16 GB or more
- Video Output: HDMI 2.0, DisplayPort 1.4, or newer
- USB Ports: 3x USB 3.0 ports, plus 1x USB 2.0 port
- Operating System: Windows 10 or newer
Ensuring your PC meets these specifications is vital. It ensures a seamless VR experience.
Installing Necessary Software
Connecting a VR headset to your PC requires installing the necessary software. This step is crucial for a seamless VR experience. Without proper software, your headset might not function correctly. Let’s explore the essential software you need to install.
Vr Software
To start, download the VR software that matches your headset. Visit the official website of your VR headset’s manufacturer. Look for the download section and find the appropriate software. For Oculus, download the Oculus app. For HTC Vive, download the Viveport software. Ensure you choose the right version for your operating system.
Once downloaded, open the installer. Follow the on-screen instructions. Usually, this involves agreeing to terms and conditions and selecting an install location. After installation, launch the software. You may need to create an account or log in if you already have one. The software will guide you through the initial setup process.
Driver Installation
Drivers are essential for your VR headset to communicate with your PC. Most VR software includes the necessary drivers. Sometimes, you might need to download them separately. Check the manufacturer’s website for any additional drivers.
To install drivers, follow the prompts from the VR software. If separate drivers are needed, download them from the official site. Run the installer and follow the instructions. After installation, restart your PC to ensure all changes take effect.
Remember, keeping your drivers updated is important. Regular updates fix bugs and improve performance. Check for driver updates periodically through your VR software or the manufacturer’s website.
Credit: www.thecryptoupdates.com
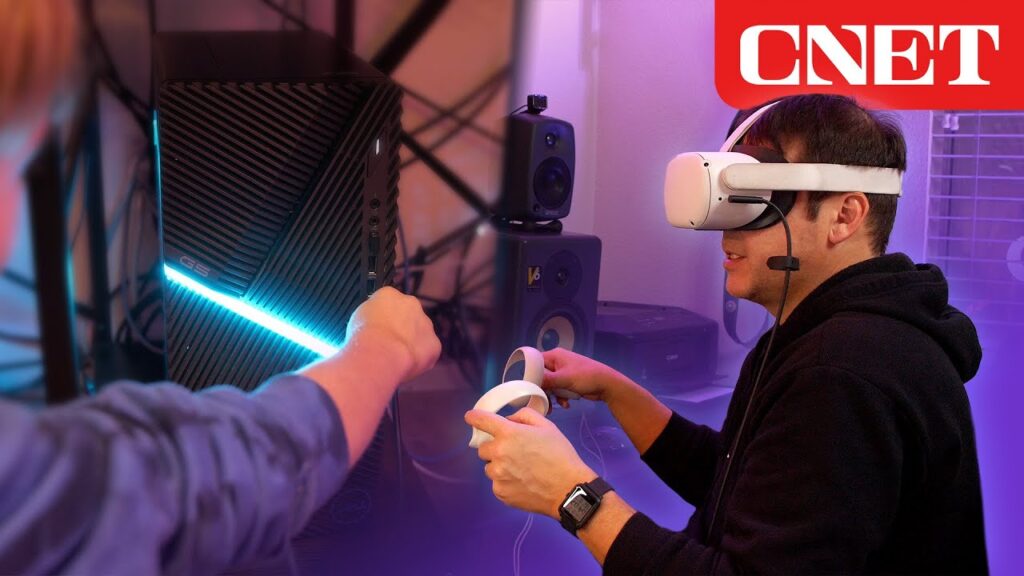
Connecting Vr Headset To Pc
Connecting a VR headset to your PC opens up a world of immersive experiences. Whether you’re gaming, exploring virtual worlds, or watching 360-degree videos, a proper connection is key. Below, we will guide you through the steps to connect your VR headset to your PC. We cover two main methods: using USB and HDMI, and wireless connection.
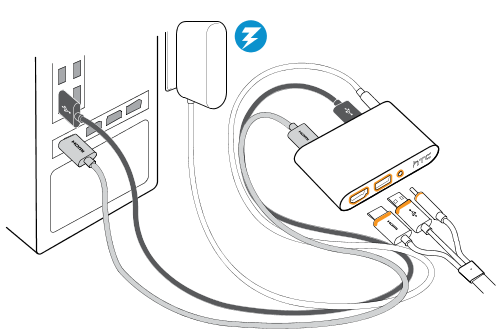
Using Usb And Hdmi
Most VR headsets connect to PCs via USB and HDMI cables. Start by locating the necessary ports on your PC. These are usually found on the back of the tower.
- Plug in the USB cable: Find an available USB 3.0 port and insert the USB cable from the VR headset.
- Connect the HDMI cable: Locate the HDMI port on your PC’s graphics card. Connect the HDMI cable from the headset to this port.
- Power up the headset: Ensure the headset is plugged into a power source, if required.
- Install drivers and software: Once connected, your PC may prompt you to install specific drivers. Follow on-screen instructions to complete the installation.
Using USB and HDMI ensures a stable and high-quality connection for your VR experiences.
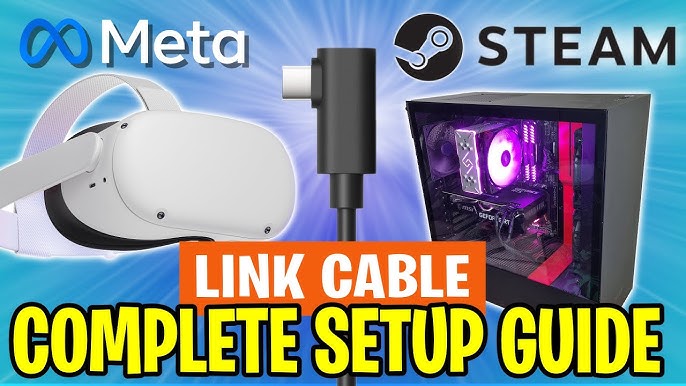
Wireless Connection
Some modern VR headsets offer wireless connectivity for a more untethered experience. This method requires both a compatible headset and a strong Wi-Fi network.
- Check compatibility: Ensure your VR headset supports wireless connection.
- Set up Wi-Fi: Connect both your PC and VR headset to the same Wi-Fi network.
- Install necessary software: Some headsets require specific software for wireless connection. Download and install the appropriate software from the headset’s official website.
- Pair the devices: Open the software on your PC and follow the pairing instructions. Your headset should now connect to the PC wirelessly.
Wireless connection provides freedom of movement, enhancing your VR experience significantly. Ensure your Wi-Fi signal is strong to prevent interruptions.
Setting Up Vr Sensors
Setting up VR sensors is crucial for an immersive VR experience. Proper placement and calibration ensure accurate motion tracking. This helps create a seamless virtual reality environment. Follow these steps to set up your VR sensors correctly.
Placing The Sensors
First, choose a clear area for your VR setup. Remove any obstacles that could interfere with the sensors. Place the sensors at opposite corners of your play space. Ensure they have a clear line of sight to each other and your VR headset. Mount the sensors at a height of 6 to 7 feet. Angle them downwards towards the center of your play area. This helps cover the entire play space effectively.
Calibrating The Sensors
Next, connect the sensors to your PC via USB cables. Open the VR software provided by your headset manufacturer. Follow the on-screen instructions for sensor calibration. This process usually involves standing in the middle of your play area. Move your VR headset in different directions as prompted. Ensure the sensors can track your movements accurately. Calibration is complete once the software confirms proper tracking.
Configuring Vr Software
Configuring VR software is a critical step to ensure a smooth VR experience. The right setup can make the difference between an immersive experience and constant frustration. This section will guide you through the process of configuring VR software after connecting your VR headset to your PC.
Initial Setup
Start by downloading the necessary VR software for your headset. This software is usually available on the manufacturer’s website. Install the software on your PC. Follow the on-screen instructions during installation. This will help the software recognize your VR headset.
Once the installation is complete, launch the VR software. Connect your VR headset to your PC using the appropriate cables. Ensure all connections are secure. The software will now detect your headset. If prompted, allow the software to install any additional drivers or updates. This ensures your VR headset works correctly with your PC.
Customizing Settings
After the initial setup, it’s time to customize your settings. Open the settings menu in the VR software. Here, you can adjust various options to enhance your experience. Start by calibrating the headset. This step ensures the VR environment aligns with your physical space. Follow the on-screen prompts to complete the calibration process.
Next, adjust the display settings. You can change the resolution and refresh rate to match your PC’s capabilities. Higher settings provide a clearer and smoother experience. Be mindful of your PC’s performance. High settings can strain your hardware. Test different settings to find the right balance.
Finally, customize the control settings. This includes mapping buttons and adjusting sensitivity. Each VR game or application may have different control requirements. Customizing controls can improve comfort and ease of use. Save your settings once you are satisfied.
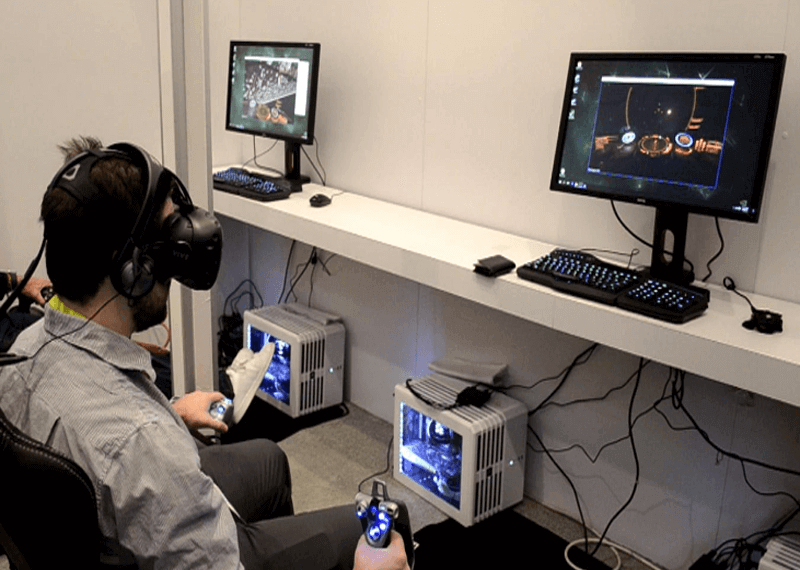
Testing The Vr Setup
Testing your VR setup is a crucial step to ensure everything runs smoothly. After connecting your VR headset to your PC, you need to test it. This will help identify any potential issues and confirm that the setup works correctly. Follow these steps to make sure your VR experience is seamless.
Running A Demo
Start by running a demo program. Most VR systems come with a built-in demo. Launch the demo through the VR software. Observe the visuals and responsiveness of the headset. Ensure the display is clear and free from lag. Move around to test the motion tracking. Confirm that the audio is working properly. Running a demo helps verify the basic functionality of your setup.
Troubleshooting Issues
Encountering issues is common. Here are steps to troubleshoot:
- Check Connections: Ensure all cables are securely plugged in.
- Software Updates: Update your VR software and PC drivers.
- Restart: Restart your PC and VR headset.
- Recalibrate: Recalibrate the headset sensors and controllers.
- Consult Manuals: Refer to the user manual for specific errors.
If problems persist, consider seeking help from online forums or customer support. Testing your VR setup thoroughly ensures a smooth and immersive VR experience.
Credit: www.youtube.com
Enhancing Vr Experience
Connecting a VR headset to a PC can open up a world of immersive possibilities. But to truly enjoy the experience, you need to focus on enhancing your VR setup. There are several ways to enhance your VR experience, from using VR accessories to optimizing your system’s performance.
Using Vr Accessories
VR accessories can significantly improve your immersion and comfort. Here are some must-have accessories for a better VR experience:
- VR Controllers: These provide accurate tracking of your hand movements and enhance interaction.
- Headphones: High-quality headphones ensure immersive audio, making the experience more realistic.
- Comfort Straps: These help distribute the weight of the headset, making it comfortable for long sessions.
- Protective Covers: These keep your lenses and headset clean and scratch-free.
Optimizing Performance
To get the best VR experience, you need to optimize your PC’s performance. Follow these tips to ensure smooth gameplay:
- Update Drivers: Ensure your GPU and VR headset drivers are up-to-date for compatibility and performance.
- Close Background Applications: Free up system resources by closing unnecessary applications running in the background.
- Adjust Graphics Settings: Lower the graphics settings in your VR games to achieve smoother performance.
- Use a Wired Connection: A wired connection often provides a more stable and faster data transfer than wireless.
By following these tips, you can enhance your VR experience significantly. Enjoy smoother gameplay, better immersion, and more comfort with the right accessories and optimized performance.
Frequently Asked Questions
How Do I Connect A Vr Headset To My Pc?
To connect a VR headset to your PC, you need compatible ports like HDMI or USB. Install the necessary software and drivers. Follow the setup instructions provided by the VR headset manufacturer.
What Cables Are Needed For Vr Headset Connection?
You typically need HDMI, USB, or DisplayPort cables to connect a VR headset to a PC. Some headsets require additional power cables. Check the specific requirements of your VR headset model.
Can I Use A Wireless Vr Headset With My Pc?
Yes, some VR headsets support wireless connections. You need a compatible wireless adapter and software. Ensure your PC meets the minimum system requirements for wireless VR headsets.
Which Vr Headsets Are Best For Pc Gaming?
Popular VR headsets for PC gaming include Oculus Rift S, HTC Vive, and Valve Index. These headsets offer high-quality graphics and immersive experiences. Choose based on your budget and requirements.
Conclusion
Connecting your VR headset to your PC opens up new adventures. Follow the steps outlined for a smooth setup. Ensure your PC meets the system requirements. Use the appropriate cables and software. Double-check connections if issues arise. Now, you’re ready for an immersive experience.
Enjoy exploring virtual worlds and interactive gaming. Troubleshooting tips can help with any hiccups. Dive into VR with confidence and enjoy the technology. Happy gaming and exploring!